- Learn from the Living Library
Recipe for 3D Mycelium
GENERAL INFORMATION
Mycelium makes up the roots and branches of the fungi. It is formed of a very fine filamentous network of hyphae that branches out underground. They form connections with other hyphae in search for nutrients and moisture from its surroundings. We typically only see the mushrooms of the fungi which most closely resemble the fruit or flowers of plants.
Mushrooms have long been used by humans for their medicinal, practical and mind altering properties. More recently they have also been used as a way to clean pollution.
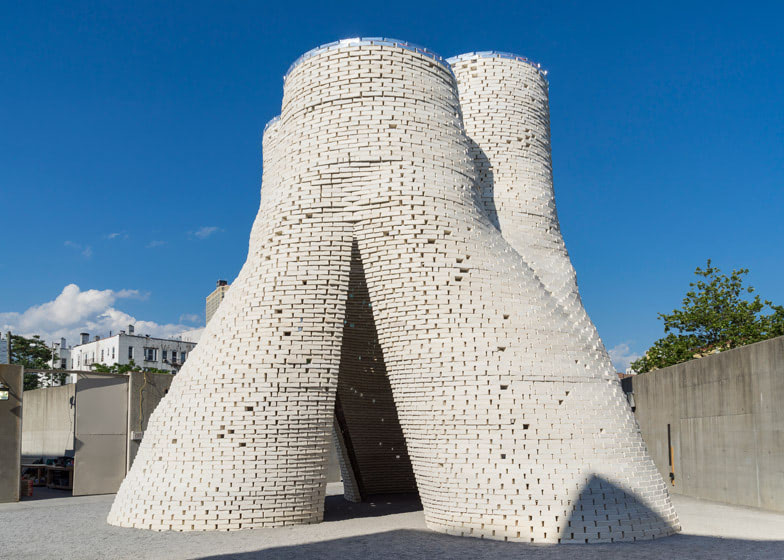
While the individual hyphae are very thin and weak, the thousands of them together make quite a strong felt like material. It can be combined with stronger cellulose based natural fibers to bind them together into a much stronger material. This material is light, fireproof and biodegradable. It has been used as packaging material and heat isolation.
RECIPE
INGREDIENTS
- Cellulose fiber based substrate
- (straw, wood, hemp, coffee grounds etc.)
- Tip: untreated waste products can be used very well!
- Ethanol 70%
- Sporeless Oyster- or Reishi Mushroom starter
- Plastic wrap
- Autoclave bag
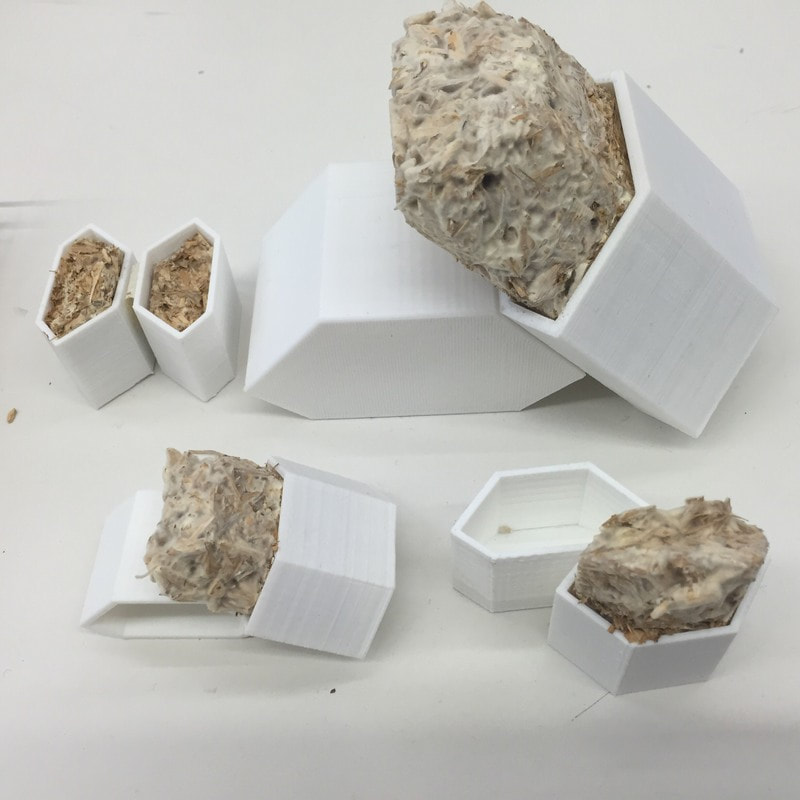
- A 3D mould
- to grow your mycelium in a desired shape
- Optional: Malt Extract
TOOLS
- Pressure cooker (autoclave)
- BioSafety Cabinet
- or other way to create a sterile environment
- Latex or rubber gloves
- Incubator or heating mat
- Oven or dehydrator
- Thermometer
METHOD
1. Prepare the substrate mixture
- Soak your fibers in water overnight
- Optional: add 30g of malt extract to the water, this will increase the growth but also the chance of contamination
- Drain the fibers of excess water
- Optional: mix with a bit of coffee grounds (10% weight coffee grounds)
- Put the mixture in an autoclave bag
- maximum half full
- Close the bag with cotton and elastic band
- This to let the air move in and out without contamination
2. Sterilize the substrate
- Place the bag in the pressure cooker
- After the pressure cooker is pressurized, leave it to sterilize for 20-40 minutes before switching it off
- Leave to cool until maximum of 30 degrees Celsius
- Do not try to open the pressure cooker until the temperature is well below 100 degrees, this can lead to sudden boiling!
- Above 30 degrees will kill the mycelium
- Optional: You can speed the cooling down of the bag under running cold water but make sure nothing gets in the bag!
3. Inoculate the substrate
- Break down the mycelium starter into small pieces without taking it out of the bag.
- Organize your sterile environment, get the bag with the substrate, ethanol and the mycelium starter.
- When cooled down below 30 degrees, put on the gloves and disinfect them with ethanol.
- The inside of the substrate bag is sterile so try to keep it that way. We inoculate with the mycelium starter.
- Carefully open the bag with the substrate with as little as possible movements all within the sterile environment
- Open the bag with the mycelium starter and scoop some material with your disinfected gloves into the substrate bag
- Minimum of 10-20% of the total volume should be mycelium starter, in order to decrease the possibility of contamination
- Close the bag with the cotton and the rubber band again
- Leave enough room for air in the bag to mix
- Gently but thoroughly mix the starter and the substrate for 5-10 minutes so there is a nice even mix
- Leave the bag at 25 degrees to grow for a few days until whitish and well inoculated
- how long will depend on many factors like substrate, type and amount of mycelium starter and mainly temperature
4. Growing the mycelium in the mould
- Gently break the substrate again into smaller pieces
- Sterilize the mould with 70% ethanol
- Use gloves again to take the inoculated substrate out of the bag and press well into the mould
- no sterile environment is needed if the substrate is well inoculated but you can to incease the chance of success
- Cover the mould well with plastic wrap
- Leave for a few days to grow strong and the mould is covered in whitish fluff
5. Growing outside of the mould
- take the mycelium gently out of the mould and put it in a plastic bag to continue to grow for a few days
- This will increase the strength and also evalorate some of the water
- you will notice the outside will become more covered in soft white mycelium
6. Drying the mycelium
- When the whole outside is covered in mycelium and the shape is quite sturdy we can stop the mycelium to keep it from growing
- you can continue to grow the mycelium the outside will become a more yellow/brownish colour in irregular shapes
- Put the object in a dehydrator or oven at 80 degrees Celcius for about 2 hours depending on the thickness
- some thin objects can be dried in the sun or on the radiator
- some heavy and thick objects need to be dried for 12 hours or more
- too long is not a problem, too short can lead to contamination
- turn the object every hour to let the moisture evaporate from all sides
- Your object is done!
REFERENCES
Mediamatic.org, n.d., link
Biofabforum.org by Elise Elsacker, Kristel Peters and Winnie Poncelet, 2018, link
Textile Academy by Waag, 2020, link
Mycoworks, 2023, link